Showing posts with label How to's. Show all posts

Saturday, February 4, 2012

DIY Project: Dry Erase Board!

As you may not all know, I love decorating my room. And last year of October I just finished remodeling my room as my birthday gift to myself.  I'll show you some other time my renovated room but first for this post I'll be sharing to you a DIY project that I did that I found at realsimple.com. 
This project is for everyone. Especially if your a type of person that loves to read inspiring quotes that keeps you motivated in your day.Which I always do. As much as possible I try to write so may inspiring quotes every 3 days or whenever I'am in the mood to change. Just to keep me reminded of things and also to keep my spirit up in a very chic decorative look that will really make a change in your room or elsewhere but also in yourself.
So here it is, SHALL WE!?!
Here are all you need.
1. Frame
2. Construction paper or Art paper. (Choose a color that suits you)
3. Whiteboard board marker (Dry Erase Marker)
OPTIONAL: Glue
Photobucket
Choose a color you like.
I chose pink cause I'am following color theme of my room.
I know most picture frame automatically have a frame pattern that will center a picture. 
If not you can just make you own style of framing. But if you do, glue the colored paper you chose to that frame or you may not also if your planning to change the background of your board every once in a while.
Photobucket
After that you can now assemble everything at the back make sure it fit snuggly.
and VIOLA! PERFECT!
Photobucket
 WRITE AWAY!!
Photobucket
 This is pretty easy to clean up.
I suggest using a dry tissue paper in wiping.
REMEMBER! Use only a white board marker!
Photobucket
You can even be artistic and draw your own framing pattern:)
Photobucket
 There are plenty of uses that this simple project can do for you.
Like you can place this near your study and make it as your reminder board, things to do list,Or in the kitchen for your mom's or yourself for grocery list and etc..
 Hope that was helpful for you and again see you soon!
Photobucket

Monday, June 13, 2011

Make Up Q-tips

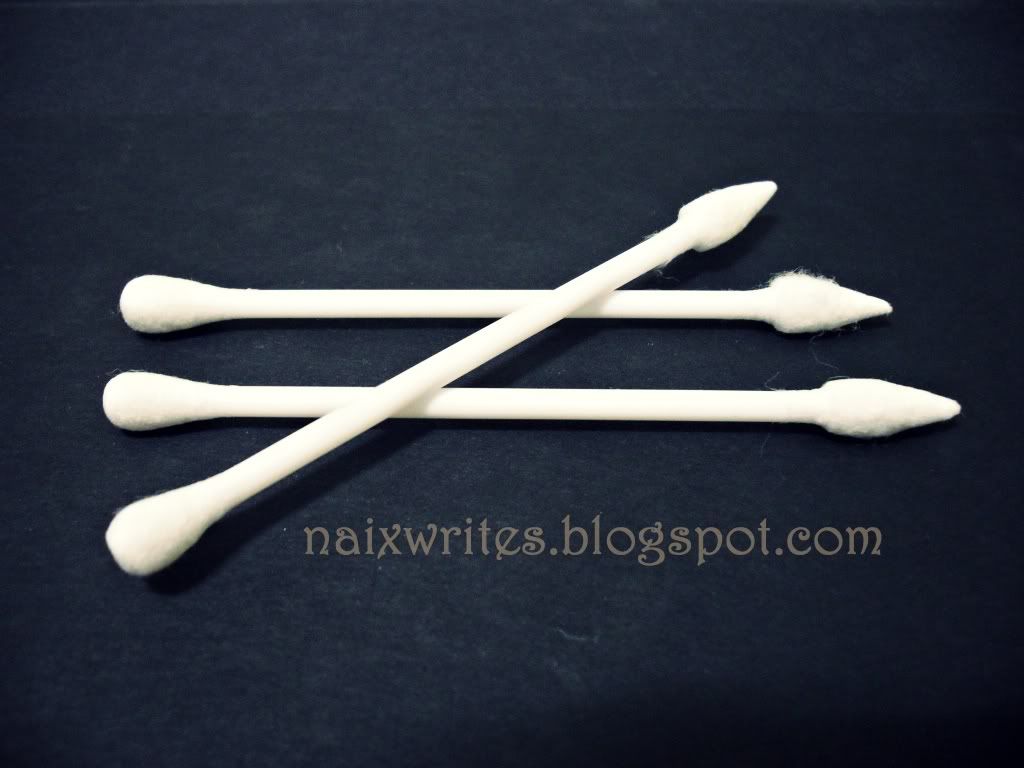
I recently found this cool make up q-tips which I find very very helpful for makeup artists out there.
It has a different dual ends. One side which I very much like is a pointed cotton tip, That is very helpful in applying and removing some makeup mistakes. There are tons of function for this type of q-tip especially its a dual end. I bet alot of make up artist would consider this as a essential in their train cases.
Photobucket
Here are few tips on how this q-tip can help you in removing and applying makeup!
Photobucket
WHERE: Novo
PRICE: P20/ 70pcs
CHEAP & ACCESSIBLE TO EVERYONE PLUS ITS GREAT!
Totally Recommended!

Thursday, June 2, 2011

MUA 101

Last May 31'11 I was invited to do makeup for a fashion show for the Trumpets Model's and Of course i said yes! I willingly agreed and It was my first time hired as a real makeup artist and it would really help my career in this field to learn and know more people that will help me make this as a profession.

Anyway, they instructed us to bring only tools like spatula's, mixing plates, make up brushes for this event for they will be providing the makeup's that we will be using which I think would be a challenge for me. And of course Business Cards a must bring!

4 days before this event started I though of things that I should be bringing especially I was new to these types of things. I searched some famous Makeup Artist's on Youtube just to see if they have any tips on starting and preparing for a Makeup event. I've watched and learned alot of what to expect and what to do and etc.

1. First thing I did was look for containers. For my sponges, Qtips, cottons, wipes and etc. I dont have containers for that especially travel friendly cases. I usually store my sponges in my oldies glass jar which I LOVE! But i cant bring the whole jar with me!
duh!?
Photobucket
So bought this in Japan Home Center for only P66!
Its a small Food box that has a divider. Which is perfect!
Plus the clasp close's really tight which made me happy:)
Photobucket
2. Tweezers.
I dont tweez my brows or anything thats hairy, for the record. I find it painful for me. I bought this for false lashes. I learned from the Pixiwoo sisters that using bare hands for applying someone else's false lashes is not hygienic! Especially its near the eye's which is a sensitive area. We don't want our clients getting infected with anything. Cause i usually do my lashes with my own bare hands. Ooopsies.:/ But I LEARNED! :)

Got this for P98. I forgot the brand sorry!
Photobucket
3. Brush Roll's
Ok, I know that every makeup artist has this VERY basic tool. The brush roll. Well I wasn't planning on getting a brush roll cause I know i have one. I kept it somewhere cause now that I'm placing my brushes on my glass brush holders I or people here kept it. But when I was looking for it again, I can't seem to find it and of course  got nervous cause that means I have to buy another set of brushes to be able to get a brush roll! Means I'am gonna be spending P1000 plus worth of brushes just to get a brush roll!

So went to my trusted Ebay suki! Where i basically get everything and saw this 14 pockets Brush Roll's and immediately clicked the "BUY IT NOW" button. It was pretty much cheaper than I thought!
P250 + Shipping fee 100= 350
Got 2pcs of 12 pockets brush roll plus a travel size brush roll PLUS a free sample of Coastal Scent Mica Powder.
Photobucket
As you can see, I dont usually buy brushes that are in one set. I just bought a one set brushes one time that's why I only have one brush roll but still I lost it. Such a waste.:c I usually buy brushes individually. Cause I wanna know and get what specific brushes are good than getting a set that you dont know if everything works for you or maybe not all are good. So being practical I buy and get only what is good from a specific brand.
Photobucket

Photobucket
And I love the colors too and its satin made. Speaking of made they were cheap cause I think they were hand made brush roll which fascinated me. I wish I had thought of that! Pretty cool idea.
Photobucket
And the free sample of Coastal Scent Mica Powder.
This shade is Cellini Yellow.
Photobucket
Here it is swatched.
I dabbed some lightly on my hand. And as you can see how pigmented it is. Very impressive.
Photobucket
4. Business Cards.
From all of these items this was one that got me really worried cause I needed this which is very important if your serious in getting into makeup business and I only have like 4 days to produce business cards. I realized that this takes like a week or so to get done especially the type of design I really wanted was a bit complex BUT simple looking so I went to multiply.com and searched for some print ads services and saw and asked alot of people. Ended up doing business with  Fun Prints Factory. 

This whole card as seen here was not totally the design I wanted and they told me if I wanted the design I really like it'll take a week so got no choice but went to the simple design, no pictures added cause most MUA are doing it so I decided not too but include my website portfolio instead in my card. 
Photobucket
All details are in the back but cant show you cause of private reason's. aha
I decided to cut the edges so that it wont look that dull boring look and kept it simple and straight to the point.
Most people i gave my cards were amazed and asked how much I paid the extra service of cutting and what did I used to cut. I just used a pair of scissor.aha I pretty much got good feedbacks with the card I gave to and I was happy.

I really think Business cards are essential!
  "You never know when you'll bump into someone you haven't seen in years and who may just be a valuable contact. So whether your doing the grocery, out running errands, or simply hanging out with friends, make sure your business cards are tucked inside your wallet or purse. Be Prepared!"
- Belle de Jour Planner
Photobucket

Hope that helps for others like me out there.
And Thank you all for visiting!
BYE!

Tuesday, March 1, 2011

Shelf Life Of A Make Up Product!

Photobucket
Sharing with you an article i read from allure magazine but i wont be mentioning everything that i read but the important details i learned from it, Basically i learned when does make ups expire which i know every girl out there knows a thing or two regarding these. 
Photobucket
MASCARA
Mascara!    
Of all the make up products you have you should be vigilant about mascara's cause they are more prone of trapping bacteria through their moist brushes. As the brush is taken out, applied, and put back in the tube, it brings with it any bacteria that has collected along the way.
SHELF LIFE: 2 to 3 months


LIQUID FOUNDATION
Photobucket
All foundations are water-based, which means bacteria love them. An off smell or a change in color tells you the formula is finished applying it could cause irritation or breakouts.
SHELF LIFE: 6 to 12 months.

CONCEALER
Photobucket
SHELF LIFE (in powder and stick form)
2 years
SHELF LIFE (Liquid)
1 year

FACE POWDER
Photobucket
SHELF LIFE: 2 Years

BLUSH
Photobucket
To prolong the life of any blush, Wilson advises cleaning your blush brush regularly and storing the color in a dark, dry place. "If your blush gets wet, you run the risk of promoting bacterial growth," To prevent this from happening, after applying foundation and moisturizer, wait a couple minutes before putting on blush. You can also blot excess oils from your face first, then, after your blush is on, immediately wipe off your brush with a dry towel.  

SHELF LIFE (Cream Blush)
1 year
SHELF LIFE (Powder)
2 years

EYESHADOW
Photobucket
 Even though they are similar in formulation to other powders, because they're constantly in contact with a mucous membrane, there's a higher risk of transferring bacteria to the product and then back to the eyes. Pay extra attention to cream-based shadows, which tend to grow bacteria more quickly than powders. If you use your fingers to apply, wash your hands before doing so.
SHELF LIFE: 3 months

EYELINER
Photobucket
Like eye shadows, they are applied near a sensitive area and can pick up bacteria and bring it back to the eye very easily "without any visible signs of contamination," Hammer warns.Pencils will last a bit longer than liquid if you're steadfast about regular sharpening, but you'll know they're dead once a white film starts to develop on the tip that can't be sharpened off, says Dubroff 
SHELF LIFE: 3 months

LIPSTICKS AND LIPGLOSS
Photobucket
Lipsticks and glosses contain oily ingredients that start to smell like stale cooking oil over time, according to Dubroff, who also says to look out for changes in texture. "You'll know a lipstick has gone bad when it gets hard and you can't spread the pigment on your lips; lip gloss will feel streaky and globby if you try to apply it.
SHELF LIFE: 1 year

Its a bit funny cause most or all of these i dont normally do! 
I feel bad throwing my hard earned makeups :(
hmp!
but better be safe than getting any irritations, right?

Anyway, hope that was really helpful!
talk to you soon! BYE!

Sunday, February 13, 2011

DIY ILLAMASQUA Nail Quills!

Photobucket
For those who don't know Illamasqua Cosmetics they are a High End Brand of makeup that is very famous in London, England. I find their line quit mysterious and develish in a good way i guess especially the way they advertise their company. quite uncommon kind of gimmik but i love it!

Here to present to you one of their famous nail product that i been dying to have but unfortunately Illamasqua doesnt sell their line here and even though they would cant afford it.
Click down to know more!

Handmade Bespoke Nail Quills


Photobucket
This cost for L35 in london, you do the math! Insanely Expensive! These were handmadewhich i guess made it expensive. 
"Two Nail Quills per set, designed to be worn on either thumb. Featuring a matt black finish and silver tip, match your Nail Quill with our new matt black Nail Varnish in Scorn." - Illamasqua
Photobucket
But no need to waste your money on that! Learned this from klaire a fantastic makeup Guru!
sharing with you this neat DIY illamasqua nail quills that is super easy!
Photobucket
You'll Need:
  • Scissor
  • Tape
  • Fake Nails
  • Silver Varnish
  • Black Varnish
  • Top Coat (nail polish)
  • Nail File
Step 1:
File each nail to have even and smooth edges.
Photobucket

Photobucket
Step 2:
Mark where your nail would end if you have/had short nails,
it dosen't matter what kind of pen you use to mark the nail, 
it's just a guideline so that you know where to cut the nail.

Photobucket
Step 3:
Cut the nail from the outer mark to the inner point.
Photobucket
Step 4:
You can leave the edges with an angle if you want 
but I'm going to file down the edges with a nail file (soft side) 
as I'm not too fond of having the sides pointy.

Photobucket
Step 5:
 Take a black nail varnish (or just use any colour you want) and paint the edges.
Photobucket
Apply at least 2 thick coats of black nail varnish over them. 
give the first coat around 5 minutes to dry and for the second coat 

Photobucket
Let them Dry!
Photobucket
Step 6:
Take the slices of tape and apply them like this across the nail. Now the Illamasqua Nail Quills had a much sharper angle to the silver part of the nail but I wanted to make it a bit differently. If you want the nail quills to look more accurate just angle it more :)
Photobucket

Photobucket
Step 7:
Apply a silver Nail Varnish over the end of the nail, starting at the end of the nail and then working your way down. Be careful not to have too much nail varnish on the brush!!
Photobucket
Step 8:
Don't risk removing the tape till you are sure the silver nail varnish is dry. Go watch a film or something while you're waiting, you don't want to mess up at this point and if dry ready to remove the tape gently.
Photobucket
Step 9:
Top coat, dry and your done!!
Photobucket
My Own Illamasqua Nail Quills!!
YEY!!!
Photobucket
LOVE LOVE LOVE!!
Photobucket

Hope That Helps!
Buhbye!!:)

Wednesday, February 9, 2011

SKIN MYTHS


Photobucket 

THE MYTH: Drinking lots will prevent wrinkles.
THE TRUTH: "There is not one study that say's water will make the skin look better. Unless you severely dehydrated, you wont notice a difference in your skin by drinking more."

THE MYTH: Oxygen facials will make skin look younger.
THE TRUTH: "They're Hokey, and there is no proof they work. They're probably not harmful, but glycolic peels or microdermabrasion treatmenst are more effective."


THE MYTH: Using a rich moisturizer will stave off wrinkles.
THE TRUTH: "It might temporarily minimize the appearance of fine lines, but there is no evidence that a regular cream will prevent aging. You need one with an anti-aging ingredient."


THE MYTH:  Facial Exercises will keep the skin from sagging.
THE TRUTH: "Its the skin that's get saggy not the muscles. And you might even increase the lines in your face because you are making expressions that contributes to them."


Dermatologist Jeffrey S. Dover
- Kayleigh Donahue